Before you jump on your bike it’s highly recommended you run through a pre ride motorcycle check to ensure your bike is in good condition and won’t leave you in trouble. It can be crucial to catch anything unsafe or possibly even illegal (e.g. bald tyres), but also to keep tabs on general wear, tear and items due for servicing.
When to do Pre Ride Motorcycle Checks
It’s advisable to go through these before each ride or at least every few days if you ride daily. If your bike has been parked unused for several days or you’re planning a longer trip away, then definitely run through these checks. If you’re commuting daily on your motorbike you can probably go through this pre-ride motorcycle inspection every few days as you get more in tune with your bike’s condition and how often items need attention.
The POWDERS Motorcycle Check
Yep, it’s a funny acronym, but it will help you remember how to do motorcycle pre ride inspection, so you do not forget anything. This how to is one I was taught as part of my IAM training and can be found in the RoadCraft book.
P – Petrol
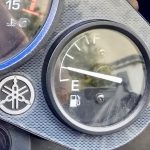 Pretty obvious really, check you’ve got enough fuel to get you where you’re going. Or heads up to plan a fuel stop if needed. Nothing more embarrassing being out of fuel and stranded. If your bike has no fuel gauge, listen as you shake the tank or open the fuel cap to check.
It’s good practice to use the odometer to track miles since you last filled the tank, this will give you an idea of how many miles you have left in the tank, and highlight if your economy changes significantly. If your bike has a reserve tap, ensure it’s not been left on…
O – Oil
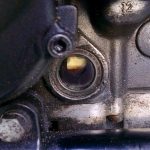 Definitely not one to be skipped, oil is essential for the smooth running of your bike. Read your bike’s manual on how to check oil levels – usually via a sight glass or dip stick, where you can confirm the level is between a high and low point. For an accurate read it is a common requirement to warm the engine up for 5 mins, then leave off for a couple of mins and then take a reading whilst the bike is perfectly upright.
Also pay attention to oil colour, which will normally deviate from red-orange to black between changes. A milky-white colour can indicate water leakage and possible serious engine issues. Also be mindful of months/miles since last change and when your next is due.
W – Water
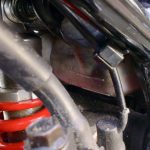 Assuming you don’t have an air cooled bike, water or coolant is essential to keep your bike cool. Running empty can cause your engine to overheat potentially resulting permanent damage. Levels are normally checked in two places; the overflow tank often near the rear of the bike, and at the main water filler cap on the radiator (or somewhere near above it).
If levels are tricky to read on the overflow bottle, try shining a torch at it. The main filler cap is often hidden under the fuel tank – take care, do not open whilst the engine is hot. Top up as needed with a coolant mixture recommended for you bike for your climate.
D – Damage / Drive chain
You’d think damage would be obvious to spot, but it is not uncommon for some bastard to knock you bike over, pick it up again and then you not realise until you’re half way down the road wondering where half your brake lever has gone…
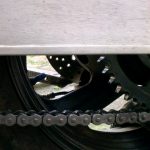 You drive chain takes a lot of punishment, so should be checked to ensure:
- It’s not dry and has adequate lube
- It’s not too slack or tight (check bike manual for correct amount of slack)
- It doesn’t have stiff links (two links stuck at funny angle)
- Sprocket teeth are not too worn, rounded or hooked over
Shaft and belt drive bikes need less maintenance, but should still be inspected for any obvious wear and tear.
E – Electrics
Confirm all yours lights work, no blown bulbs, indicators work, front/rear brakes trigger brake light, horn works. It’s wise to also double check kill switch and side stand switch cuts the engine too – these are checked on your yearly MOT.
R – Rubber
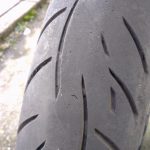 You rely on your tyre rubber to maintain grip and keep you upright, so do double check their condition. Check for excessive wear down to the wear markers in the treads (or even just excessive squaring off). Also double check for any damage, debris stuck in the rubber or cracks from age. Small bits of gravel should be prised out, a blob of spit over the hole will confirm if deep enough to cause a puncture.
Also double check air pressures and that they’re inflated to correct spec. A bikes handling can change drastically with a change of a few PSI.
S- Stopping / Self
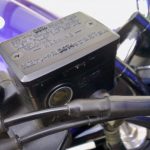 Your brakes should stop you when needed. Check for brake pad wear or any drop in brake fluid. Pads usually have a wear marker groove, which once reached indicate the pads should be replaced. A drop in brake fluid can indicate wear of pads or a leak. Your front and rear brake fluid reservoirs should have low level markers.
Lastly, check your Self. Easy to overlook, but what state are you in? Are you overly tired, wound up with anger, ill or injured? If you’re not feeling 100%, consider not riding at all, most riding mistakes are made when the rider is under the weather or their mind is distracted.
Summing Up
If you follow this POWDERS motorcycle check regularly, you should have a worry free ride less likely to be hampered by a breakdown. I hope it will also give you better understanding of what keeps your bike running and awareness of items that should be serviced before they turn into more costly jobs.
One reply on “Pre Ride Motorcycle Check – POWDERS Bike Check”
This as really helpful,
Thank you:-)